Category Archives: Recipes

Life’s Like a Box of Chocolates…

My momma always said, “Life was like a box of chocolates. You never know what you’re gonna get.” — Forrest Gump

Forrest Gump is remarkably good at summing up life through his wonderfully apt quotes. And I fully agree with the one above, when faced with a box of chocolates, you never know if you’re going to pick the delicious praline or creamy mocha or the citrus-y orange (unless you bother to check under the lid for full descriptions of course!) πŸ˜› Though, unfortunately (or possibly fortunately) life doesn’t come equipped with such handy cheat-sheets!

As you may have guessed, this post is all about creating a box of chocolates or a little box of bite-sized randomness (something like a little portion of life to share with someone else!) There’s some chocolate-philosophizing for you (because really chocolate carries all the answers, if you ask me, especially dark chocolate).

I’ve never really made chocolates before, though to do it right there’s a great deal to learn about tempering and finding the right temperature, etc, etc. But my efforts are more straightforward, and started out from this lovely recipe I found for homemade peanut butter cups (a la Reese’s peanut butter cups, but homemade).

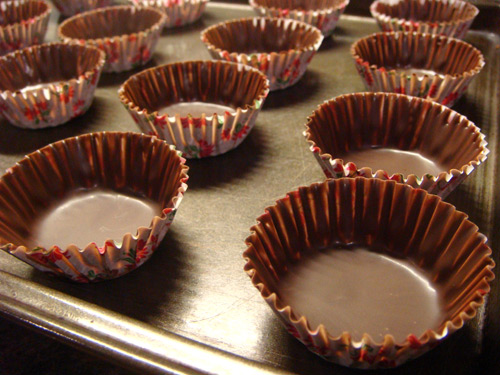
The first step is to brush chocolate up the sides of a mini cupcake wrapper to make the ‘cup’. I used a mix of dark chocolate, milk chocolate & milk chocolate mocha for the ‘cups’. Some were made with mini-cupcake wrappers like above, and some with chocolate wrappers like below. I got these gorgeous chocolate wrappers in Japan, and found them SO cute and perfectly appropriate for a chocolate gift box.

However, for this recipe would recommend rather using the paper ones as above, because they peel away rather easily, leaving one with just a nice ridged exterior to the chocolate, whereas the tougher aluminum ones below are extremely hard to peel away to eat the chocolate inside. Plus the paper shells made larger cups meaning more place for filling inside πŸ˜›

While refrigerating these cups, the next step is to prepare the filling. I did a mix of fillings, including the peanut butter filling recommended by the recipe.

Lemon cream cheese & peanut butter filled.

Peanut butter & white chocolate ganache
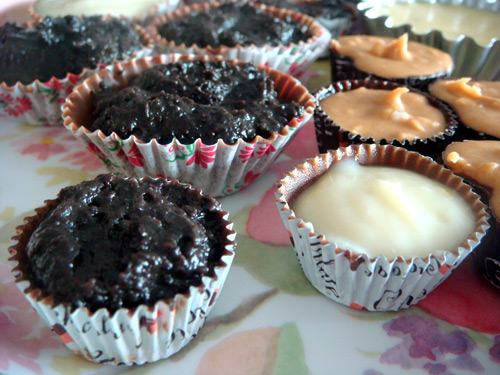
Oreo, lemon cream cheese & peanut butter filled.

Dark chocolate ganache (by far the best!), and cookie dough in the background.

Cookie dough! A bit too sweet, but interesting flavor.

Adding some decorativeness!

Covering up the tops, and this is what the final should look like! (But a bit neater, hopefully then mine.)
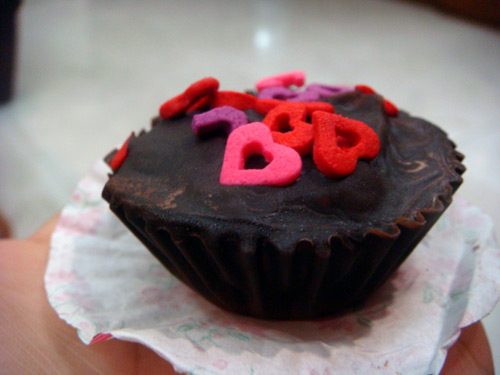
Mine has the marbled effect due to running out of dark chocolate, so mixed some milk chocolate in half way for the tops.

Mmm, and halfway through a cookie dough chocolate!

And time for recipe(s)! Basically I made all these chocolates by varying around the fillings of a base peanut butter cup recipe which follows. I really loved the simple idea of brushing chocolate up a mini cupcake wrapper to get the ‘Reese’s’ look.

Chocolate Peanut Butter Cups
adapted from Genesis of a Cook

Ingredients

  • 1 1/2 cups chocolate chips (semi-sweet, dark chocolate or white chocolate) — I used instead a bar of dark chocolate bar and milk chocolate (the dark chocolate is easiest to work with)
  • 1/2 cup creamy peanut butter
  • 1/2 cup crunchy peanut butter
  • 1/2 cup confectioners’ sugar
  • 1/2 tsp vanilla
  • pinch of salt

Method

  1. Place two dozen mini cupcake wrappers on a baking sheet. Melt half the chocolate (in the microwave or using a double boiler/bain-marie) until smooth.
  2. Using a spoon, pour a bit of chocolate in each wrapper and use a small brush to paint the chocolate up the sides of each wrapper. Refrigerate for 20-30 minutes.
  3. In a small bowl, whisk together the two types of peanut butter, sugar, vanilla and salt. When it has come together, microwave until it is extremely soft (around 30 seconds should do it).
  4. Once the chocolate has set, spoon the peanut butter mixture into each cup. Refrigerate for another 30 mins.
  5. Melt the remaining chocolate and cover the tops of each cup. Refrigerate until set and enjoy!

Oreo Truffles
adapted from Bakerella‘s now-famous recipe
I followed the recipe above exactly, but used the oreo filling only from this recipe to replace the peanut butter filling above. Anyways the full recipe follows, for those who would like to try it out.

Ingredients

  • 16 oreo cookies (including the cream centers)
  • 8 oz cream cheese (softened)
  • dark, milk or white chocolate (I usually use dark)

Method

  1. Finely crush the oreo cookies in a food processor. I separate the creams when doing this.
  2. Stir in the softened cream cheese and cream centers. Use the back of a large spoon to mash the two together. Generally I don’t end up using the entire 8 oz cream cheese, so go slowly until the consistency of the mixture seems about right. If it’s too soft, it will be really difficult to handle.
  3. Refrigerate or freeze the mixture for around 5-10 minutes to make it easier to handle.
  4. Roll the mixture into 1″ balls and place on a wax paper covered cookie sheet
  5. Melt the chocolate using a double boiler. Dip the balls into the chocolate, tap off the excess and set aside on the wax paper to dry. Use a small teaspoon or fork to do this. I generally end up using two teaspoons. If needed, double dip the truffles or use a toothpick to fix errors.
  6. You can sprinkle the tops with crushed cookies for decoration. Once they are dry, refrigerate and enjoy!

Cookie Dough Filling
This is adapted from another recipe for cookie dough filling, I had lying around. A bit too sweet for my liking, but definitely an interesting idea. This recipe looks more promising, so hopefully will try it out soon!

Ingredients

  • 1/4 cup unsalted butter at room temp
  • 3/4 cup powdered sugar
  • 1 tsp vanilla extract
  • 1/4 cup mini choc chips

Method

  1. Stir together butter, sugar, vanilla until smooth.
  2. Stir in chocolate chips.
  3. Place filling in each cup made as described above.
  4. Enjoy!

For the lemon cream cheese cups, I mixed together cream cheese, lemon rind, lemon juice and powdered sugar. Unfortunately can’t seem to remember the proportions at the moment, but it’s pretty simple, and can be done to one’s taste while mixing!

For the dark chocolate and white chocolate ganache, I followed this lovely recipe @ Epicurious. Do check it out, as it was very useful and simple to follow for a chocolate novice like myself. Plus the results were absolutely delicious πŸ™‚

There’s loads more delicious fillings I can think of using the deceptively simple technique outlined above — like nutella, cappuccino mousse, cheesecake, horlicks cheesecake (which I tried, with not-so-good results), hazelnut, tiramisu and many more! So let your imagination run wild and remember the limits of your world are only constrained by your mind’s ability to conceive more. And indeed, a box of chocolates you create will be a pure illustration of what your life holds for you (well, not really, but my chocolate-philosophizing needed a good conclusion). Enjoy! πŸ™‚

❀ Sue

Martha Stewart’s Chocolate Salted Caramel Cupcakes

Salted caramel is one of those flavors that many might find strange upon hearing of it, but honestly once you get your first taste of salted caramel there’s no looking back! My first encounter with salted caramel was @ Tom’s Palette, a yummy little ice-cream parlor in Singapore. My two flavors of choice at this parlor — chocolate sorbet and salted caramel side-by-side in a cup!

Can I just say that little tinge of salt just creates the most perfect flavor sensation when paired with melt-in-your-mouth dark chocolate ice cream and buttery caramel? Such a perfect combination! Naturally then, when flipping through my brand new copy of Martha Stewart’s Cupcakes — a gift from my sis — this wonderful recipe entitled ‘Chocolate Salted-Caramel Mini Cupcakes’ caught my eye and soon it was time to bake them up!

Unfortunately though I couldn’t find any fleur-de-sel over here where I stay, so I used regular salt, which really just didn’t give that delicate salty sensation these cupcakes needed.


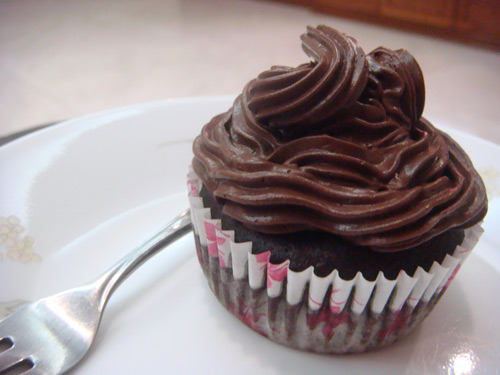
Still, I learnt to make caramel (never done before) and I loved Martha’s dark chocolate frosting recipe which piped on beautifully onto the most perfect-looking cupcakes I have ever baked! And honestly, you can’t really go wrong with dark chocolate cupcakes, filled with caramel and topped with chocolate frosting. Maybe not as good as the taste the mind conjured up, but still pretty Damn Good! Thanks, Martha! πŸ˜€

I did a mix of mini-cupcakes and normal sized cupcakes and found somehow the mini ones did just taste better! Possibly because I ran a little short of caramel (not due to the recipe, but due to a small accident which left me with a large lump of sugar and a small amount of caramel!) so the large cupcakes were slightly wanting on caramel flavor.

Chocolate Salted-Caramel Mini Cupcakes
Makes around 56 mini cupcakes

Ingredients

  • 1 1/2 cups all purpose flour
  • 3/4 cup unsweetened Dutch process cocoa powder
  • 1 1/2 cups sugar
  • 1 1/2 teaspoons baking soda
  • 3/4 teaspoon baking powder
  • 3/4 teaspoon salt
  • 2 large eggs
  • 3/4 cup buttermilk (I substituted yoghurt in same amount)
  • 3 tbsp vegetable oil
  • 1 tsp pure vanilla extract
  • 3/4 cup warm water
  • Salted Caramel Filling (recipe follows, keep it warm!)
  • Sea Salt (preferably fleur de sel, for garnish) — I couldn’t get this and used regular salt NOT the same thing at all!
  • Dark Chocolate Frosting (recipe follows)

Method

  1. Preheat oven to 350F (approx 175C). Line cupcake pan with paper liners. In a mixing bowl, whisk together flour, cocoa, sugar, baking soda, baking powder and salt. Add eggs, yoghurt, oil, vanilla and water. Beat at low speed with an electric mixer, until smooth and combined.
  2. Divide the batter evenly among the lined cupcakes, filling about 2/3 full. Bake until a cake tester inserted in center comes out clean — should be around 15 minutes. Cool for around 10 minutes before removing from pan.
  3. For the filling, use a paring knife to cut a cone-shaped piece (around 1/2 inch deep) from the center of each cupcake. Spoon 1-2 teaspoons warm filling into each hollowed out cupcake. (For the bigger cupcakes around 3-4 teaspoons of filling is needed with a hole of around 3/4 inch depth). Sprinkle a pinch of sea salt over the filling.
  4. Fill a pastry bag fitted with a medium star tip (Martha recommends Wilton #18) with frosting. Pipe frosting onto each cupcake, swirling up and releasing as you pull up to form a peak. Garnish each cupcake with a pinch of sea salt. Do not refrigerate the cupcakes; store at room temperature in airtight containers. (I put mine in the refrigerator though and they were just fine).

Salted Caramel Filling
Makes around 2 cups

Ingredients

  • 2 1/2 cups sugar
  • 2/3 cup water
  • 1 tablespoon light corn syrup (I substituted honey)
  • 3/4 cup heavy cream
  • 2 1/2 teaspoons sea salt (preferably fleur de sel)

Method

  1. Heat sugar with the water and corn syrup in a heavy saucepan over high, swirling occasionally until syrup is clear.
  2. Stop stirring and cook until syrup comes to a boil, washing down sides of pan with a wet pastry brush as needed.
  3. Boil, gently swirling pan occasionally until mixture is caramelized and just reaches 360F (use a candy thermometer as needed)
  4. Remove from heat, and immediately (but slowly) pour in cream. The mixture will spatter. Stir with a wooden spoon until smooth. Stir in sea salt.
  5. Use immediately. If the caramel begins to harden, reheat gently until it is pourable again.

Dark Chocolate Frosting
Makes around 5 cups

Ingredients

  • 1/4 cup plus 2 tablespoons Dutch-process cocoa powder (I used van Houten)
  • 1/4 cup plus 2 tablespoons boiling water
  • 1 1/2 cups unsalted butter, room temp
  • 1/2 cup confectioners’ sugar, sifted
  • Pinch of salt
  • 1 pound semi-sweet chocolate, melted and cooled

Method

  1. Combine the cocoa and boiling water, stirring until the cocoa has dissolved. With an electric mixer on medium high speed, beat butter, confectioners’ sugar and salt until pale and fluffy.
  2. Reduce speed to low. Add melted and cooled chocolate, beating until combined and scraping down sides of bowl as needed. Beat in the cocoa mixture.
  3. I refrigerated the frosting for around half an hour to harden it a bit (due to high humidity levels/heat where I live things melt really fast) then beat on low speed until it was smooth again. And wow, this frosting is really amazing — really smooth, dark and even quite tasty, and best of all, wonderfully pipe-able.

❀ Sue

Cupcake Loves 04 – Tiramisu Cupcakes

Tiramisu. Literally: ‘pick-me-up’

Tiramisu. Moist flavorful coffee-soaked cake, mascarpone cheese, cream cheese frosting. A delicious Italian dessert of which the name literally translates to pick-me-up (referring to the espresso, of course!)

Now, have you ever imagined a tiramisu cupcake? I simply adored the idea. One of my favorite desserts in an individually sized serving. Delicious. So I googled and found this – a lot of steps but nothing too difficult.

The original recipe calls for a box mix, but I can’t stand box mixes so I turned to no-fail Betty Crocker yellow cake (always delicious). After which I became sure my cupcake explosions were due to the cupcake liners, because even no-fail Betty Crocker cake became the victim of a volcanic cupcake spill! Sighs.

The process is simple enough. First, bake up your white or yellow cake. Cut out the centers (I used a small, sharp knife), and fill with mascarpone cheese. Plug the hole back up and then frost with delicious cream cheese frosting (this frosting was bloody amazing, I even used it to cover up the lemon cheesecupcakes). Plus it was almost pipe-able. Just almost. Think a little bit more icing sugar & some time in the refrigerator would make this one slightly stiffer and definitely pipe-able. Must try again!

These cupcakes were delicious. The combination of the cake + mascarpone cheese filling + cream cheese frosting was just perfect. Unfortunately, I found my cupcakes were a bit lacking on a) coffee flavor b) mascarpone filling. The cupcakes became a bit too moist (I should have used the foil liners recommended by the original recipe!) because my mascarpone filling was a bit too runny — possibly because I was unable to get any Cool Whip (+ it is SO preservative filled), so I replaced to whipped cream instead.

My advice to anyone making this recipe is to liberally brush on the espresso and to fill with as much mascarpone as possible! Tiramisu should be melt-in-your-mouth soft, soft, soft with tons of coffee flavor. It is a bit difficult to measure out the perfect consistency of soft coffee soaked cake against moist mascarpone filling, so do experiment to find the optimum ratio!

The recipe definitely has tons of potential though! I made one last individual tiramisu with leftover coffee, cake, mascarpone cheese & cream cheese frosting. I layered them over and over to build up one super delicious, super sweet individual tiramisu trifle. It was Really Good.

So then, here’s the recipe!

Tiramisu Cupcakes
Adapted from Becky Bakes
Makes approx 24 cupcakes

Ingredients

Cupcake

  • 1 recipe Betty Crocker yellow cake

Liquid Coffee Layer

  • 2/3 cup water, boiling
  • 1/2 cup confectioners sugar
  • 1 1/2 tbsp instant coffee

Mascarpone Filling

  • 1 cup mascarpone cheese
  • 3 tbsp coffee extract –> (made from 3 tbsp coffee + 1/2 cup boiling water)
  • 1/4 cup sweetened condensed milk
  • Whole Cream –> whipped to medium soft peaks with 1-2 tbsp sugar + 1-2 tsp vanilla extract

Frosting (double if piping on top)

  • 8oz (226g) cream cheese, softened
  • 1/2 cup butter, softened
  • 2 1/2 cups confectioners’ sugar
  • 1 tsp vanilla extract

Method

  1. Make the mascarpone filling (this needs to be made ahead): Beat mascarpone, coffee extract + condensed milk until well blended. Fold in whipped cream. Chill filling mixture 4-6 hours or overnight.
  2. Prepare yellow or white cupcakes. While these are baking, prepare the liquid coffee as below.
  3. Liquid Coffee: Boil 2/3 cup water + stir in instant coffee and powdered sugar. Allow to cool to tepid. Once cooled, use a fork to poke holes into each cupcake so that they will absorb the liquid coffee. Then brush liquid coffee onto each cupcake using a silicone baking brush.
  4. Cut holes in the top of each cupcake and brush more liquid coffee in each hole. Fill pastry/icing bag with mascarpone filling and inject about 1-2 tablespoonfuls via the bag directly into the top-center of each cupcake. Plug each cupcake back with a small amount of cake.
  5. Prepare cream cheese frosting: Beat butter and cream cheese together until creamy with hand mixer on low. Slowly add powdered sugar, scraping down the sides of the bowl as necessary. Add vanilla and increase mixer speed to medium. Blend until frosting is fluffy. At this stage you may need to add more powdered sugar to thicken up the frosting’s consistency slightly.
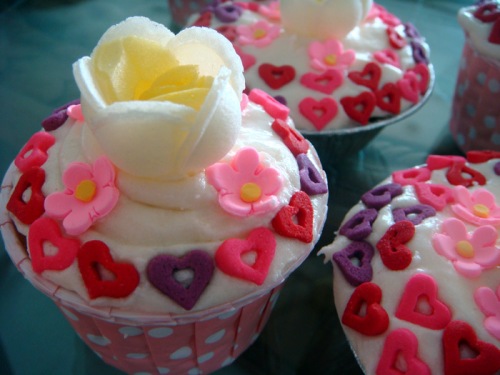
  6. Frost each cupcake with the frosting (I piped on some & used a spatula for others) and decorated with little pink hearts and flowers.

Enjoy! ❀ Sue

Cupcake Loves 03 – Chocolate Magic Cupcakes with PB Frosting

Peanut Butter + Chocolate = Sheer Bliss

I’ve been reading this wonderful novel entitled Julie & Julia for a while now and am really enjoying it. It’s amazingly encouraging and makes me want to cook up a storm, and indeed learn the fine art of French cooking from Julia Child’s cookbook (I nearly bought it the other day while at the bookstore!) I narrowly managed to stop myself though, since I doubt I’d end up making anything in the book as I really very much prefer just making desserts.

Still though it’s been wonderfully inspiring especially since we’ve just started up this food blog and I’m simply enjoying reading Julie Powell’s everyday success story celebrating the little miracles and triumphs of life. Just the way I love to live my own life πŸ™‚ It’s been really motivating in getting these posts up! I always need a bit of a push to do anything properly πŸ˜‰ So on to completing the cupcake series!

One of my all-time favorite combinations in dessert is chocolate + peanut butter. Especially dense, chocolatey-chocolate, dark and rich and moist. Plus sweet ‘n’ slightly salty melt-in-your-mouth peanut butter. The perfect marriage of taste, sensation and color. A delicious symphony of melodious flavors if you will.

Naturally, I knew one of the cupcakes in the series simply had to be peanut butter + chocolate and so, after much deliberation I settled on this recipe.

And ooooh, what an absolutely amazing choice!

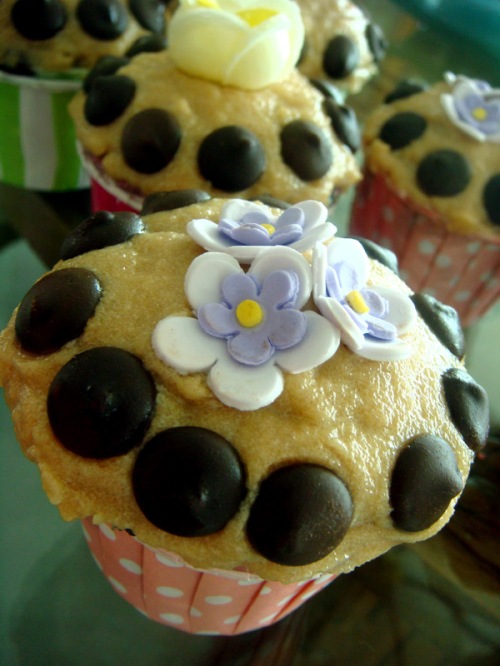
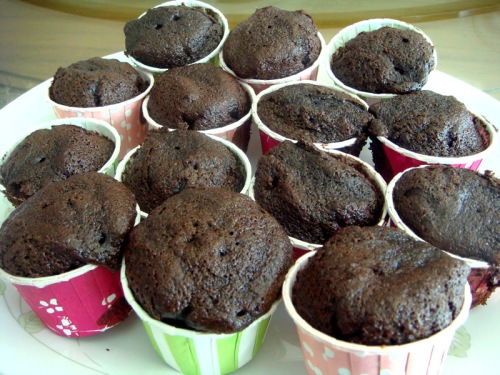
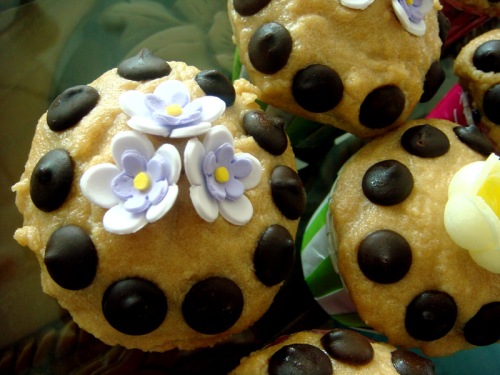
The cake was moist, dense, chocolatey, super rich and yet wonderfully light. The frosting was melt-in-your-mouth-peanut-butter-perfect. Unfortunately however, these cupcakes were the victims of volcanic ruptures. The perfectly formed tops were marred by exploding cupcake mixture. Sigh. Plus the frosting was waaaay too thin for me to pipe on with the perfection of the original. So I used a spatula to slather it on (liberally) instead and decorated with some nice sugar and wafer rosettes as well as van houten chocolate buttons.

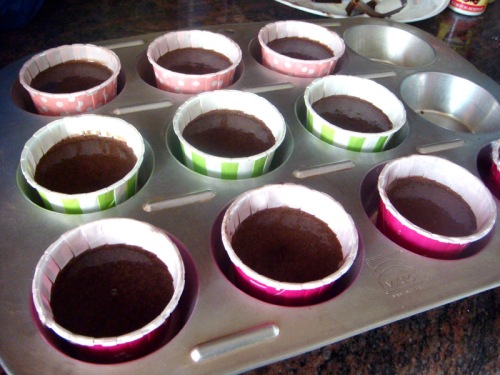
You can see some of the sorry pictures of the cupcakes in their unsaved state near the top of this post. I had to perform some major cupcake surgery on this lot :/ But the end result was so worth it. And did I mention how a-maz-ingly delicious they were? Like seriously, nearly unbelievably so? πŸ˜‰

Would definitely go for this recipe again. The cupcake explosion, again I think happened because of the cupcake liners I used. The frosting. Well the frosting, I really don’t know. I think I’m just incapable of whipping up any kind of good frosting :/ some major practice needed ahead! πŸ˜‰

Black Magic Cupcakes
Adapted from Une-deux Senses & originally from Milk and Honey Cafe
Makes 24 cupcakes

Ingredients

  • 2 cups sugar
  • 1 3/4 cups flour
  • 3/4 cups unsweetened cocoa
  • 2 tsp baking soda
  • 1 tsp baking powder
  • 1 tsp salt
  • 2 eggs
  • 1 cup buttermilk (I replaced to 2tbsp yoghurt + warm water to make one cup)
  • 1 cup strong coffee (2 tsp instant coffee + 1 cup boiling water)
  • 1/2 cup vegetable oil
  • 1 tsp vanilla extract

Method

  1. Preheat oven to 350F (175C) and line cupcake pan with liners & set aside.
  2. Sift together the sugar, flour, cocoa, baking soda, baking powder and salt in a large bowl.
  3. Add the eggs, buttermilk, coffee, oil & vanilla.Β  Beat on medium speed for 2 minutes until well combined.
  4. Pour into prepared pans about 2/3 full and bake for 20 mins or until an inserted toothpick comes out clean. Cool completely before frosting.

Peanut Buttercream Frosting
Adapted from Une-deux Senses & originally from The Boastful Baker
Yields enough to frost 12 cupcakes (with a spatula; if you are planning to pipe this on, probably better to double the recipe).

Ingredients

  • 1/4 cup margarine, softened
  • 2 tbsp shortening (I used butter)
  • 1/3 cup creamy peanut butter
  • 1 tbsp honey
  • 1 1/2 tsp vanilla extract
  • 1 1/4 cups powdered sugar, sifted
  • 1-2 tbsp soy milk

Method

  1. Cream together the margarine and shortening at medium speed until smooth.
  2. Add the peanut butter, honey and vanilla and beat until smooth (approx 2-3 mins). Beat in the powdered sugar (the mixture will be stiff).
  3. Slowly add the soy milk, beating continuously until frosting is pale tan and very fluffy. If too thick, or too thin, add more soy milk or powdered sugar until the right consistency is achieved.
  4. At this point I had to tip in at least 1/4 cup more powdered sugar then the recipe recommended because the frosting was too soft. Even after the additionΒ  it was still too soft so perhaps it needs even more. Do keep a watch on the stiffness of the mixture as you’re beating to be sure of proper consistency.

❀ Sue