My momma always said, “Life was like a box of chocolates. You never know what you’re gonna get.” — Forrest Gump
Forrest Gump is remarkably good at summing up life through his wonderfully apt quotes. And I fully agree with the one above, when faced with a box of chocolates, you never know if you’re going to pick the delicious praline or creamy mocha or the citrus-y orange (unless you bother to check under the lid for full descriptions of course!) 😛 Though, unfortunately (or possibly fortunately) life doesn’t come equipped with such handy cheat-sheets!
As you may have guessed, this post is all about creating a box of chocolates or a little box of bite-sized randomness (something like a little portion of life to share with someone else!) There’s some chocolate-philosophizing for you (because really chocolate carries all the answers, if you ask me, especially dark chocolate).
I’ve never really made chocolates before, though to do it right there’s a great deal to learn about tempering and finding the right temperature, etc, etc. But my efforts are more straightforward, and started out from this lovely recipe I found for homemade peanut butter cups (a la Reese’s peanut butter cups, but homemade).
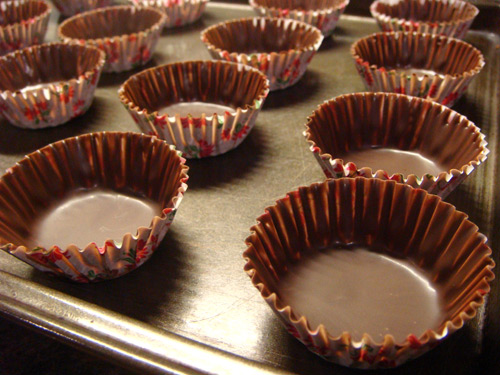
The first step is to brush chocolate up the sides of a mini cupcake wrapper to make the ‘cup’. I used a mix of dark chocolate, milk chocolate & milk chocolate mocha for the ‘cups’. Some were made with mini-cupcake wrappers like above, and some with chocolate wrappers like below. I got these gorgeous chocolate wrappers in Japan, and found them SO cute and perfectly appropriate for a chocolate gift box.
However, for this recipe would recommend rather using the paper ones as above, because they peel away rather easily, leaving one with just a nice ridged exterior to the chocolate, whereas the tougher aluminum ones below are extremely hard to peel away to eat the chocolate inside. Plus the paper shells made larger cups meaning more place for filling inside 😛
 While refrigerating these cups, the next step is to prepare the filling. I did a mix of fillings, including the peanut butter filling recommended by the recipe.
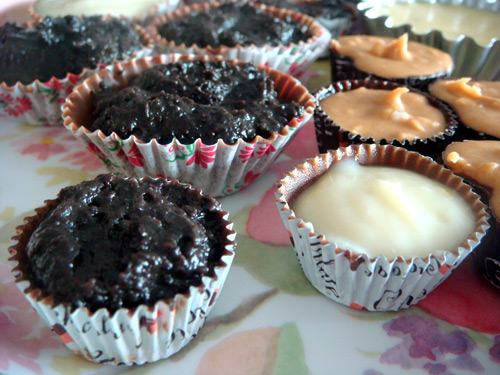
 Lemon cream cheese & peanut butter filled.
 Peanut butter & white chocolate ganache
 Oreo, lemon cream cheese & peanut butter filled.
 Dark chocolate ganache (by far the best!), and cookie dough in the background.
 Cookie dough! A bit too sweet, but interesting flavor.
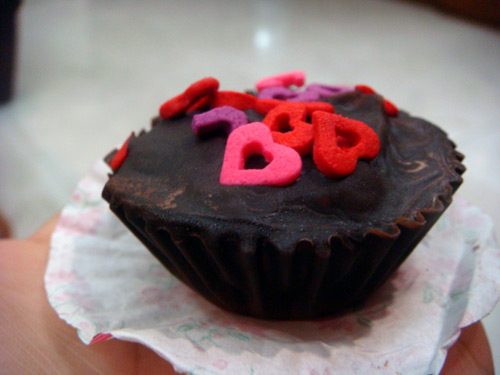
 Covering up the tops, and this is what the final should look like! (But a bit neater, hopefully then mine.)
 Mine has the marbled effect due to running out of dark chocolate, so mixed some milk chocolate in half way for the tops.
 Mmm, and halfway through a cookie dough chocolate!
And time for recipe(s)! Basically I made all these chocolates by varying around the fillings of a base peanut butter cup recipe which follows. I really loved the simple idea of brushing chocolate up a mini cupcake wrapper to get the ‘Reese’s’ look.
Chocolate Peanut Butter Cups
adapted from Genesis of a Cook
Ingredients
- 1 1/2 cups chocolate chips (semi-sweet, dark chocolate or white chocolate) — I used instead a bar of dark chocolate bar and milk chocolate (the dark chocolate is easiest to work with)
- 1/2 cup creamy peanut butter
- 1/2 cup crunchy peanut butter
- 1/2 cup confectioners’ sugar
- 1/2 tsp vanilla
- pinch of salt
Method
- Place two dozen mini cupcake wrappers on a baking sheet. Melt half the chocolate (in the microwave or using a double boiler/bain-marie) until smooth.
- Using a spoon, pour a bit of chocolate in each wrapper and use a small brush to paint the chocolate up the sides of each wrapper. Refrigerate for 20-30 minutes.
- In a small bowl, whisk together the two types of peanut butter, sugar, vanilla and salt. When it has come together, microwave until it is extremely soft (around 30 seconds should do it).
- Once the chocolate has set, spoon the peanut butter mixture into each cup. Refrigerate for another 30 mins.
- Melt the remaining chocolate and cover the tops of each cup. Refrigerate until set and enjoy!
Oreo Truffles
adapted from Bakerella‘s now-famous recipe
I followed the recipe above exactly, but used the oreo filling only from this recipe to replace the peanut butter filling above. Anyways the full recipe follows, for those who would like to try it out.
Ingredients
- 16 oreo cookies (including the cream centers)
- 8 oz cream cheese (softened)
- dark, milk or white chocolate (I usually use dark)
Method
- Finely crush the oreo cookies in a food processor. I separate the creams when doing this.
- Stir in the softened cream cheese and cream centers. Use the back of a large spoon to mash the two together. Generally I don’t end up using the entire 8 oz cream cheese, so go slowly until the consistency of the mixture seems about right. If it’s too soft, it will be really difficult to handle.
- Refrigerate or freeze the mixture for around 5-10 minutes to make it easier to handle.
- Roll the mixture into 1″ balls and place on a wax paper covered cookie sheet
- Melt the chocolate using a double boiler. Dip the balls into the chocolate, tap off the excess and set aside on the wax paper to dry. Use a small teaspoon or fork to do this. I generally end up using two teaspoons. If needed, double dip the truffles or use a toothpick to fix errors.
- You can sprinkle the tops with crushed cookies for decoration. Once they are dry, refrigerate and enjoy!
Cookie Dough Filling
This is adapted from another recipe for cookie dough filling, I had lying around. A bit too sweet for my liking, but definitely an interesting idea. This recipe looks more promising, so hopefully will try it out soon!
Ingredients
- 1/4 cup unsalted butter at room temp
- 3/4 cup powdered sugar
- 1 tsp vanilla extract
- 1/4 cup mini choc chips
Method
- Stir together butter, sugar, vanilla until smooth.
- Stir in chocolate chips.
- Place filling in each cup made as described above.
- Enjoy!
For the lemon cream cheese cups, I mixed together cream cheese, lemon rind, lemon juice and powdered sugar. Unfortunately can’t seem to remember the proportions at the moment, but it’s pretty simple, and can be done to one’s taste while mixing!
For the dark chocolate and white chocolate ganache, I followed this lovely recipe @ Epicurious. Do check it out, as it was very useful and simple to follow for a chocolate novice like myself. Plus the results were absolutely delicious 🙂
There’s loads more delicious fillings I can think of using the deceptively simple technique outlined above — like nutella, cappuccino mousse, cheesecake, horlicks cheesecake (which I tried, with not-so-good results), hazelnut, tiramisu and many more! So let your imagination run wild and remember the limits of your world are only constrained by your mind’s ability to conceive more. And indeed, a box of chocolates you create will be a pure illustration of what your life holds for you (well, not really, but my chocolate-philosophizing needed a good conclusion). Enjoy! 🙂


